

OpenGeoAI: Geospatial AI Made Simple
Artificial Intelligence, the thing that e-v-e-r-y-o-n-e is talking about. Naturally, we also need to discuss it. But first things first, let’s go through some terminology
- Artificial intelligence, AI = a machine that mimics human intelligence (at least in part)
- Geospatial Artificial Intelligence, GeoAI = the integration of artificial intelligence (AI) with geospatial data, science, and technology.
- OpenGeoAI = a Python library that contains tools for using Geospatial Artificial Intelligence
What does it really mean to integrate artificial intelligence with geospatial anything? Well it can mean many different things, for example detecting features from an aerial image, or turning raster data into vector data, or using a text prompt to create geospatial features.
Today we are going to talk about a GeoAI toolset called OpenGeoAI. What’s so special about it? Well, I would argue that it’s the open part that makes it stand out. It’s an open source project and it’s free to use by anyone. It’s also rapidly growing, adding more and more things to the toolbox.
OpenGeoAI works as a nice framework for easily using GeoAI models in a Python (or QGIS) environment. It contains various tools related to GeoAI and it’s a good starting point for exploring what GIS and AI can do together. OpenGeoAI mostly provides you with tools related to computer vision, but there are also others, like combining LLMs with GIS data and creating and AI Agent that has interactive mapping capabilities.
OpenGeoAI is also neat in the sense that you do not need to understand Python in order to use it. There’s a QGIS Plugin simply called ‘GeoAI’ that is easily accessible through the Plugins Manager. Since many of our readers are QGIS people we will focus mainly on the functionalities found in the QGIS plugin.
Getting Started with the OpenGeoAI QGIS Plugin
The first time you install the plugin, you’ll be prompted to install the underlying dependencies. This step happens only once and it will take a few minutes. After that you can start using the plugin. However, you’ll still need to load each AI model you want to use separately. It’s good to keep in mind that models eat up space on your hard drive. The plugin comes with seven different buttons that appear as a toolbar.

The buttons from left to right on the toolbar are:
- Tree Segmentation
- Water Segmentation
- Moondream VLM
- Segment Anything
- Semantic Segmentation
- Instance Segmentation
- Clear GPU Memory
All except the last one are different tools using different models with different purposes. Let’s go through the buttons briefly:
Tree Segmentation
This toolset contains five models provided by DeepForest. The tools can be used for segmenting trees, birds, livestock, nests and dead trees from forest canopy images. This tool is easy to test out.
Water Segmentation
This tool is used to segment waterbodies and the model is made by OmniWaterMask. The model segments waterbodies from satellite images and there are some band presets (for example for Landsat) that makes this a very easy tool to test.
Moondream VLM
VLM stands for Vision Language Model. This means that the model tries to “see” what’s in an image and come up with some logical word for describing what is “sees”. There are two models to choose from. You can then give the model an image and choose the analysis you want to do. The options are ‘Caption’, ‘Query’, ‘Detect’ and ‘Point’. With Caption you are asking the model to describe what’s in the data. With Query you can ask questions about the data. With Detect it can detect features from the data and with Point it can create point features.
Segment Anything
This tool uses Meta’s model SamGeo3. In order to use this you’ll need to request permission. With segment anything you can segment, well, anything. If you need to “cut out” for example all the buildings in a satellite picture this model will be a good alternative.
Semantic Segmentation
This toolset is very flexible since you can use this to train custom segmentation models. Semantic segmentation means that the tool tries to find the correct “group” for a feature. It can tell you “these areas are buildings” but it will not tell you “here’s building A and here starts building B…”. You can create your own training data with labels and then use that to train your model. Training your own model means that you can start to get better results and then actually start to see the benefits of machine learning.
Instance Segmentation
With Instance Segmentation you can go one step further than semantic segmentation and figure out separate features and their respective categories. It is able to tell that this is a building and over here we have another building, and they are different features. As with Semantic Segmentation, you can train the model and the available model here is Mask R-CNN.
Clear GPU Memory
This is actually just a button for clearing the memory used by the GPU (with CUDA) if you have one. It might be good every once in a while.
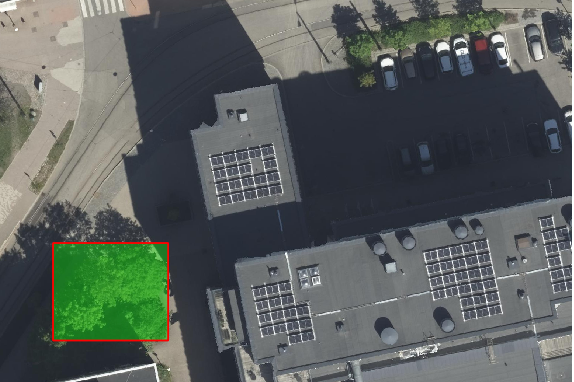
Tree segmented outside Gispo’s office.
Hardware Requirements & GPU Acceleration for GeoAI
You’ll soon realize that if you don’t have a GPU with CUDA (or something equivalent like ROCm) your processing time will be very long. However, since the whole world wants to get their fair share of processing power it is not cheap to get your hands on a powerful GPU. When you are at that point that you want to get some more out of OpenGeoAI, then you’ll probably also want to have a powerful machine where you can run it. One option would be to move the process somewhere else (the cloud) and then you’ll need to learn to write at least some code.
I want to use the Python library directly!
An easy way to start testing out OpenGeoAI is to use the ready-made Jupyter Notebooks. There are many examples, for example solar panel detection or water segmentation.
If you feel like you need some help getting started or just want to enjoy the fruits of having an awesome GeoAI model that solves your problem, please keep in touch! We at Gispo are here to help!
